
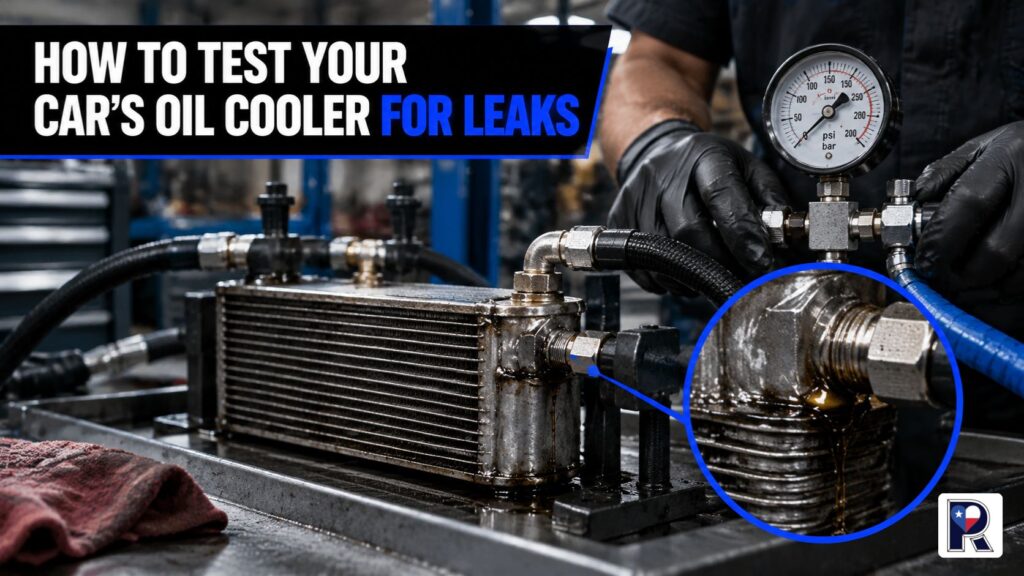
To test your car’s oil cooler for leaks, begin with a cold visual inspection, check the engine oil and coolant for cross-contamination, clean the cooler area, and monitor both fluid levels. If those checks point toward the cooler, the next step is a vehicle-specific pressure or vacuum test, followed by a controlled bench test if the diagnosis remains uncertain.
Do not apply unregulated shop air to an installed cooler. Test pressure and port configuration vary by vehicle, and excessive pressure can damage the cooler or force coolant into the oil system.
What type of oil cooler does your car have?
The correct test depends on the cooler’s design. Before disconnecting anything, identify which type is fitted to your vehicle.
Air-to-oil cooler
An air-to-oil cooler looks like a small radiator. Engine oil passes through the cooler while outside air removes heat from it.
Common leak points include:
- Cooler tubes or fins
- Hose connections
- Threaded fittings
- Crimped hose ends
- Mounting damage
- Oil cooler lines
Because this design does not normally contain engine coolant, an external leak is more likely than oil-coolant mixing.
Coolant-to-oil heat exchanger
A coolant-to-oil unit allows engine oil and coolant to pass through separate internal passages. Heat transfers between the two fluids without allowing them to mix.
If an internal wall fails, the unit may allow oil in coolant or coolant in engine oil. The direction of the contamination can vary with system pressure, temperature, and the location of the failure.
Radiator-integrated or housing-mounted cooler
Some vehicles place an oil or transmission cooler inside the radiator tank. Others use a compact heat exchanger attached to the engine or oil-filter housing.
A leak around these units may come from the cooler core, its housing, an O-ring, a gasket, or an attached line. Confirming the exact source matters because replacing the cooler will not fix a damaged seal elsewhere.
In short: Identify the cooler type first. External air-cooled units and coolant-to-oil heat exchangers fail in different ways and require different tests.
What are the symptoms of an oil cooler leak?
Common leaking oil cooler symptoms include:
- Engine oil collecting near the cooler
- Wet or oily cooler lines
- Oil around the filter housing
- Falling engine-oil level
- Coolant loss with no obvious hose leak
- Oil film or sludge in the coolant reservoir
- Milky or cloudy engine oil
- Rising oil or coolant temperatures
- A low oil-pressure warning
- Oil or coolant beneath the vehicle
None of these symptoms proves that the cooler has failed. Valve-cover gaskets, oil-filter housings, radiator hoses, head gaskets, transmission coolers, and other components can cause similar signs.
If an oil-pressure warning appears, shut the engine off as soon as it is safe. A cooler leak that reduces the oil supply can put bearings, turbochargers, and other lubricated parts at risk.
How to test your car’s oil cooler for leaks without removing it
These checks can narrow down the source before the cooler is removed.
1. Let the engine cool
Park on a level surface and wait until the engine and cooling system are cold.
Never open a hot radiator or coolant reservoir. Pressurized coolant can escape without warning and cause severe burns.
2. Check the engine-oil level and condition
Remove the dipstick and inspect the oil.
Look for:
- A level that has dropped unexpectedly
- A level that has risen without oil being added
- Cloudy or milky oil
- Water-like droplets
- Foam or unusual sludge
A small amount of light-colored residue under the oil cap can sometimes result from condensation, especially on vehicles used for short trips. Milky oil throughout the system is more concerning and requires diagnosis.
3. Inspect the coolant reservoir
Check the coolant only when the engine is cold.
Possible signs of contamination include:
- An oily film on the surface
- Brown or black deposits
- Thick sludge
- Coolant that keeps changing appearance after cleaning
- A level that falls without an obvious external leak
Oil in the reservoir can come from a failed engine oil cooler, but it can also point to a head-gasket, cylinder-head, engine-block, or radiator-integrated cooler problem. Do not replace the cooler based on reservoir appearance alone.
4. Inspect the cooler, seals, and lines
Use a bright light to inspect the cooler and surrounding components.
Look closely at:
- Hose and line connections
- Banjo bolts or threaded fittings
- Crimped hose sections
- Cooler seams
- Filter housing
- Adapter plate
- O-rings and gaskets
- Mounting brackets
- Nearby components that could drip onto the cooler
Oil travels along brackets, hoses, and engine surfaces. The wettest point is not always the source.
5. Clean the suspected area
Clean the exterior of the cooler, fittings, and surrounding surfaces with a product suitable for the vehicle and component materials. Once dry, run the engine only as permitted by the service information and watch for fresh fluid.
This helps distinguish an active oil cooler leak from residue left by an earlier oil change or repair.
If necessary, a technician may use an engine-oil-compatible fluorescent dye and inspection lamp. Only use a dye approved for the fluid and vehicle.
6. Monitor oil and coolant levels
Record the cold oil and coolant levels. Recheck them under the same conditions after limited operation.
A falling oil level with fresh oil around the cooler suggests an external engine-oil leak. Coolant loss, oil contamination, or a rising oil level requires prompt investigation.
7. Pressure-test the cooling system
A cooling system pressure test can help find external coolant leaks around a coolant-to-oil cooler, its housing, hoses, and seals.
The test should use the vehicle manufacturer’s specified pressure. Exceeding that limit can damage the radiator, reservoir, cooler, hoses, or seals.
A cooling-system test does not always prove that the cooler core is leaking internally. Some failures appear only at operating temperature or under oil-side pressure.
In short: On-vehicle testing can identify external leaks and cross-contamination, but it may not isolate an internal cooler failure with certainty.
Can you test an oil cooler without removing it?
Sometimes, but the result may be incomplete.
An installed cooler may be checked through:
- Visual inspection
- Fluid monitoring
- Cooling-system pressure testing
- Oil-pressure testing
- Manufacturer-approved isolation procedures
- Inspection of disconnected ports
- Testing for combustion gases when an engine fault is suspected
Bypassing a cooler as a home diagnostic shortcut is risky. It can reduce oil-temperature control, introduce contamination, create new leaks, or damage an engine if the bypass is routed incorrectly.
A vacuum test may also be possible on some removed or isolated units. Every fitting must seal perfectly, or a leaking adapter can create a false result.
How is an oil cooler pressure-tested on a bench?
An oil cooler pressure test checks whether a sealed cooler can hold a controlled amount of pressure without leaking.
This test is safer when the cooler is removed, cleaned, and connected to proper test fittings.
A shop typically follows this process:
- Identify the cooler’s construction and rated test pressure.
- Inspect the unit for impact damage, corrosion, or distorted fittings.
- Seal the required ports with purpose-made plugs or adapters.
- Connect a regulated pressure or vacuum source.
- Apply only the pressure specified for that cooler.
- Monitor the gauge for pressure loss.
- Check the exterior for escaping fluid or air.
- Test the second circuit separately on a coolant-to-oil heat exchanger.
- Repeat the test under the required temperature conditions when applicable.
Some removed coolers can be submerged in water while low, regulated air pressure is applied. A stream of bubbles may reveal the leak location.
This method should not be improvised with unrestricted compressor pressure. A failed plug, hose, or cooler can release stored energy and cause injury.
Why can a cooler pass a cold test and still leak?
Some cracks or seal failures open only when the metal expands under heat. Vibration and operating pressure may also affect the leak.
A cold bench test that holds pressure is useful, but it may not reproduce every real operating condition. A technician may need to combine pressure testing with fluid analysis, temperature-related testing, or inspection of related components.
In short: Bench testing is the clearest way to isolate the cooler, but the test pressure, adapters, fluid, and temperature must match the component and service procedure.
What do different test results mean?
Finding | Possible meaning | Recommended next step |
Fresh oil at a line fitting | Loose fitting, damaged seal, or failed line | Inspect and repair the fitting or line |
Oil around the cooler housing | Gasket, O-ring, housing, or cooler leak | Clean and isolate the exact source |
Oil film in coolant | Internal cooler leak or engine-related failure | Test the cooler and rule out engine faults |
Milky engine oil | Coolant contamination or condensation | Stop driving and diagnose the source |
Cooler loses pressure on the bench | Cooler core or seam is leaking | Repair if serviceable or replace |
Pressure drops but no leak appears | Test fitting leak, internal leak, or temperature-related fault | Verify adapters and repeat the test correctly |
Cooling system loses pressure | External leak or possible internal path | Inspect the full system |
No visible problem when cold | Heat- or vibration-related leak may still be present | Test under the approved service conditions |
What can be mistaken for an oil cooler leak?
Several faults can produce the same symptoms:
- Head-gasket failure
- Cracked cylinder head
- Oil-filter housing leak
- Failed cooler gasket or O-ring
- Damaged oil line
- Valve-cover leak running down the engine
- Radiator-integrated transmission cooler failure
- Oil spilled during previous service
- Condensation under the oil cap
- Cracked cooler housing
- Damaged coolant hose near the heat exchanger
An oil cooler gasket leak may be repairable without replacing the complete cooler. That is why the unit should be inspected and tested before parts are ordered.
Can you drive with a leaking oil cooler?
Driving is not advisable if:
- The oil-pressure warning is on
- Oil or coolant is draining quickly
- The engine is overheating
- Coolant and oil are mixing
- The oil level is below the safe range
- Steam or smoke is visible
- A cooler line is split
- The source of contamination is unknown
A minor external seep may not disable the car immediately, but the leak can worsen once the system heats and pressure rises. Towing is the safer choice when fluid loss or contamination is significant.
Do not add coolant or oil and assume the vehicle is safe. Topping off replaces lost fluid but does not stop the leak.
Should a leaking oil cooler be repaired or replaced?
The answer depends on what has failed.
Repair may be possible when the problem is limited to:
- A replaceable gasket
- An O-ring
- A threaded fitting
- A serviceable oil line
- A repairable seam or tube on certain cooler designs
Oil cooler replacement is more likely when the core is internally leaking, badly corroded, physically damaged, or unsuitable for a dependable repair.
Some heavy-duty and industrial units may qualify for professional oil cooler repair, rebuilding, or recoring. Passenger-car heat exchangers are often replaced when the internal core fails because their compact construction limits repair options.
Oil cooler testing for diesel, fleet, and industrial equipment
Diesel trucks, construction machines, agricultural equipment, and oilfield systems place heavier demands on their cooling components.
Their testing may need to account for:
- Higher oil volumes
- Long operating hours
- Continuous loads
- Vibration
- Dust and debris
- Multiple coolers
- Hydraulic and transmission circuits
- Equipment downtime
Permian Radiator provides lube oil cooler, hydraulic oil cooler, transmission cooler, radiator, and pressure-testing services for automotive and heavy-duty applications in San Angelo and across the Permian Basin.
A complete inspection matters when several heat exchangers are installed together. Contamination found in one system does not automatically identify which cooler or component failed.
Frequently Asked Questions
Look for fresh oil around the cooler, leaking lines, falling oil or coolant levels, an oily film in the coolant reservoir, milky engine oil, or abnormal temperatures. Testing is still needed because other faults can cause the same symptoms.
You can inspect it, monitor fluids, and pressure-test related systems while it remains installed. Confirming an internal core leak may require isolation or removal.
Not necessarily. A failed coolant-to-oil cooler is one possibility, but head-gasket, cylinder-head, engine-block, or radiator-integrated cooler problems can also cause contamination.
The cooler is isolated or removed, its ports are sealed with test fittings, and regulated pressure or vacuum is applied according to its service specification. Pressure loss or visible leakage indicates a fault.
Yes, if the leak allows enough oil to escape. Stop the engine if the oil-pressure warning appears and check the oil level before further operation.
Lines, fittings, gaskets, and some serviceable cooler designs may be repaired. A leaking compact internal core often requires replacement.
Contaminated systems generally require cleaning after the failed component is repaired. The exact cleaning procedure and products should follow the vehicle or equipment manufacturer’s instructions.
Conclusion
To test your car’s oil cooler for leaks, begin with fluid checks and a careful inspection of the cooler, gaskets, fittings, and lines. If oil and coolant are mixing or the source remains unclear, controlled isolation and pressure testing are safer than guessing or applying unrestricted compressed air.
Permian Radiator serves San Angelo, TX, with oil cooler inspection, pressure testing, cleaning, repair, and replacement for automotive, commercial, industrial, and heavy-duty equipment.
Call Permian Radiator or request a free quote to have a suspected oil cooler leak tested before fluid loss or contamination leads to a larger repair.


 ICONIER Digital Marketing Agency