
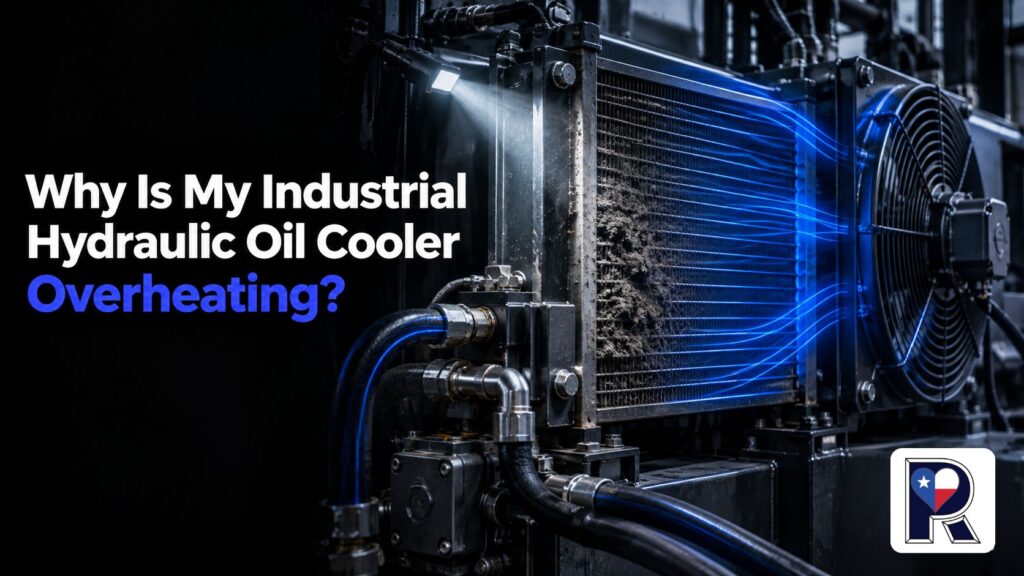
Industrial hydraulic oil cooler overheating usually means one of two things: the hydraulic system is producing more heat than normal, or the cooler can no longer remove heat effectively. Blocked fins, weak fan airflow, internal restrictions, contaminated oil, bypass-valve faults, worn hydraulic components, and excessive operating loads are common causes.
The cooler itself is not always the source of the problem. Replacing it without checking the rest of the system can leave the original heat source untouched and cause the new unit to overheat as well.
What Industrial Hydraulic Oil Cooler Overheating Really Means
A hydraulic system converts engine or motor power into fluid power. Because pumps, valves, hoses, motors, and cylinders are not perfectly efficient, part of that input energy becomes heat.
The system reaches a stable operating temperature when its cooling capacity can remove heat as quickly as the system produces it. If heat generation rises or cooling capacity falls, the hydraulic oil temperature continues climbing. Cooler manufacturers likewise describe temperature balance as the point where the cooler dissipates the system’s lost energy while maintaining the oil at a suitable viscosity.
Hot oil becomes thinner. If viscosity falls below the range required by the equipment, internal leakage may increase, lubrication may weaken, and pump efficiency can decline. This can create a cycle in which heat causes efficiency losses, and those losses produce even more heat.
In short: An overheating cooler is a symptom of an unbalanced system. The real job is to find out whether cooling capacity has dropped, heat generation has increased, or both are happening.
Eight Common Causes of Hydraulic Oil Cooler Overheating
1. Dirt and debris are blocking the cooler
Air-cooled cores need open fins and unrestricted air passages. Dust, grass, cotton, mud, oil mist, and other debris can form an insulating layer that prevents heat from escaping.
This type of restricted cooler airflow is especially relevant for oilfield, construction, agricultural, and industrial equipment operating around San Angelo and the Permian Basin. A core may look partly open from the front while debris remains packed between stacked coolers or deep inside the fins.
Inspect both sides of the core and the space between nearby heat exchangers. Cleaning methods must match the core material and manufacturer instructions because excessive air or water pressure can flatten fins.
2. The fan is not moving enough air
A clean cooler cannot work properly without adequate airflow. Possible causes include:
- A damaged or incorrectly installed fan blade
- A slipping belt
- A weak electric motor
- Low speed from a hydraulic fan drive
- A failed relay, temperature switch, sensor, or wiring connection
- A damaged or missing fan shroud
- Incorrect fan rotation
- Hot discharge air circulating back through the cooler
Check whether the fan starts at the specified temperature and reaches its intended speed. Simply hearing it run does not prove that it is moving enough air.
3. The oil side of the cooler is restricted
Deposits, degraded oil, seal material, metal particles, or contamination from a previous component failure can restrict internal passages. A clogged hydraulic oil cooler may reduce flow and create excessive pressure drop.
Pressure readings taken at the cooler inlet and outlet can help identify a restriction, but the result must be compared with the cooler manufacturer’s specification at the measured oil flow and viscosity. Cold, thick oil naturally produces more resistance than warm oil.
A technician may recommend internal flushing, flow testing, or replacement depending on the cooler design and the type of contamination.
4. The hydraulic fluid is wrong, degraded, or contaminated
Hydraulic fluid contamination can interfere with heat transfer, restrict small passages, damage valves, and accelerate component wear. Fluid that has oxidized may appear darker than normal or produce a burnt odor, but appearance alone is not a complete diagnosis.
The wrong viscosity grade can also contribute to overheating. Oil that is too thick may increase flow resistance, while oil that becomes too thin at operating temperature may increase internal leakage.
Confirm the following before changing fluid:
- The required oil type and viscosity grade
- The actual operating-temperature range
- Whether different fluids were mixed
- Filter condition and bypass status
- Water, particle, or oxidation test results
- The OEM’s flushing and refill procedure
Can dirty hydraulic oil cause overheating? Yes, but changing the oil alone will not solve the problem if worn pumps, sticking valves, internal restrictions, or a damaged cooler contaminated it in the first place.
5. Oil is bypassing the cooler
Some systems use a pressure-controlled or temperature-controlled bypass to protect the cooler during cold starts or high-pressure conditions. If the bypass valve sticks open, much of the hot oil may return without passing through the core.
A failed thermostat, damaged valve seat, incorrect spring, contamination, or improper assembly may cause unwanted bypass flow. The cooler can appear defective even though it is simply not receiving the required oil flow.
Bypass components should be tested against the equipment or cooler manufacturer’s specifications rather than adjusted by guesswork.
6. A relief valve is generating continuous heat
A pressure relief valve problem can turn hydraulic power directly into heat. This can happen when a relief valve is incorrectly set, stuck partly open, contaminated, or continuously passing flow because the system is operating near its pressure limit.
One warning sign is oil temperature that remains high even when the machine is doing relatively little useful work. You may also hear unusual valve noise or observe pressure that does not behave normally.
Pressure settings should only be checked and adjusted by qualified personnel using the equipment manufacturer’s procedure. Increasing pressure without confirming component ratings creates a serious equipment and safety risk.
7. Pumps, motors, cylinders, or valves are worn
Worn components allow high-pressure oil to leak internally from one part of the circuit to another. This internal hydraulic leakage may not produce an external puddle, but it wastes energy and creates heat.
Possible sources include:
- A worn pump
- Leakage across a cylinder piston seal
- A damaged hydraulic motor
- Worn control-valve clearances
- A valve that does not shift completely
- Excessive pressure loss through undersized or damaged hoses
Flow testing under pressure is often required to isolate the faulty component. Replacing the cooler will not correct heat being generated by internal leakage elsewhere in the circuit.
8. The cooler is undersized for the actual duty cycle
Equipment modifications, longer operating cycles, heavier loads, higher ambient temperatures, or reduced ventilation can push the system beyond its original cooling capacity.
An undersized cooler may work normally during light use but lose control of the temperature during continuous high-load operation. Proper hydraulic cooler replacement requires more than matching the old unit’s dimensions. Oil flow, allowable pressure drop, heat rejection, ambient temperature, fluid viscosity, fan performance, and available installation space must all be considered.
In short: Cooler overheating can begin with the core, fan, fluid, bypass circuit, pressure settings, worn hydraulic components, operating conditions, or incorrect cooler sizing. Do not assume the most visible part is the failed part.
What the Overheating Pattern Can Tell You
What you observe | Possible cause | Useful next check |
Temperature rises mainly during heavy or continuous operation | Excessive duty cycle, undersized cooler, weak airflow, or system inefficiency | Compare load, ambient temperature, fan speed, and oil temperature with normal operating records |
Oil runs hot even at light load or idle | Relief flow, bypass fault, worn pump, or internal leakage | Check pressure, flow, valve operation, and component leakage |
Fan does not start or runs slowly | Electrical, hydraulic-drive, sensor, belt, or motor problem | Verify command signal, rotation, speed, power supply, and drive condition |
Cooler is coated with dust or oily debris | External airflow restriction or an oil leak attracting dirt | Inspect the entire core and identify the leak before cleaning |
Pressure drop across the cooler is above specification | Internal blockage, cold oil, wrong viscosity, or undersized passages | Test pressure at the specified flow and operating temperature |
Cooler inlet is hot, but the outlet shows little temperature change | Low airflow, low oil flow, bypassing, fouling, or insufficient capacity | Verify fan operation, oil flow, bypass position, and design conditions |
One hose or component becomes much hotter than nearby parts | Local restriction or internal leakage | Use temperature, pressure, and flow measurements to isolate the circuit |
Fresh oil quickly darkens or smells burnt | Continued overheating, oxidation, or unresolved contamination | Test the oil and investigate the original heat source |
A small temperature difference across a cooler does not automatically prove the core is bad. The reading depends on oil flow, heat load, ambient temperature, and cooler design. Temperature measurements are most useful when taken at repeatable points under the same operating conditions.
How to Troubleshoot an Overheating Hydraulic Oil Cooler Safely
Step 1: Stop operating outside the approved temperature range
If the oil temperature exceeds the equipment manufacturer’s limit, reduce the load or shut down according to the operating manual. Continuing to run the system may worsen oil degradation, seal damage, and component wear.
Do not open a hot reservoir or disconnect a pressurized line. Never use your hand to search for a hydraulic leak. OSHA incident records document serious injection injuries caused by escaping high-pressure hydraulic fluid.
Step 2: Record the operating conditions
Write down:
- Oil temperature
- Ambient temperature
- Equipment load
- Engine or motor speed
- Hydraulic pressure
- Time required for the temperature to rise
- Whether the fan was running
- Any recent repairs, hose changes, or fluid replacement
- Any unusual noise, vibration, or slow operation
These details help distinguish a repeatable system problem from an isolated event.
Step 3: Perform a visual inspection
With the system safely shut down and depressurized, inspect the cooler, hoses, fittings, fan, shroud, wiring, mounts, and surrounding air passages.
Look for crushed fins, oily dirt, bent guards, leaking seams, loose electrical connections, hose damage, and material trapped between cooler layers.
Step 4: Verify fluid level and condition
Check the reservoir level using the manufacturer’s procedure. Low fluid can reduce the system’s ability to store and release heat, but adding oil without finding the source of the loss is not a repair.
Confirm the oil specification and review service records. If contamination or oxidation is suspected, oil analysis provides better information than color alone.
Step 5: Test the cooling circuit
A qualified technician may measure:
- Fan speed and direction
- Air temperature entering the core
- Oil temperature at the inlet and outlet
- Oil flow through the cooling circuit
- Pressure drop across the core
- Bypass-valve operation
- Thermostat or temperature-switch operation
This shows whether the cooler is receiving the airflow and oil flow it was designed to handle.
Step 6: Check for excess heat generation
If the cooling circuit performs correctly, inspect the hydraulic system for relief flow, worn pumps, leaking actuators, sticking valves, excessive restrictions, or operation beyond the intended duty cycle.
The diagnosis must address both sides of the heat balance: how much heat the system creates and how much the cooler removes.
In short: Begin with safe shutdown and operating data, then inspect the cooler, fluid, airflow, oil flow, and bypass circuit. If those checks pass, investigate the hydraulic components producing the heat.
Should You Repair or Replace the Hydraulic Oil Cooler?
Repair may make sense when:
- The core is structurally sound but needs heat exchanger cleaning
- A serviceable tube-and-shell unit can be cleaned or rebuilt
- A repairable seam, fitting, or connection is leaking
- The fan, motor, thermostat, sensor, or shroud is the actual failed part
- Testing confirms that the cooler still has adequate capacity
- Replacement parts or a qualified repair method are available
Replacement may be the better choice when:
- The core is cracked, badly corroded, crushed, or repeatedly leaking
- Internal passages cannot be cleaned reliably
- Contamination cannot be removed to the required cleanliness level
- Repair would leave weakened material in service
- The existing cooler is undersized for the verified heat load
- A replacement provides better compatibility with the required flow, pressure, fluid, and operating environment
A larger cooler should not be used to hide a worn pump, incorrectly set valve, or excessive pressure loss. Correct the source of abnormal heat before changing cooler capacity.
Permian Radiator provides hydraulic oil cooler repair and related commercial and industrial cooling-system services from its San Angelo, Texas, and Hobbs, New Mexico locations. An inspection can help determine whether the practical answer is cleaning, repair, rebuilding, or replacement.
In short: Repair a cooler when its structure and rated capacity remain suitable. Replace it when damage, contamination, repeated failure, or inadequate capacity repairs unreliable or uneconomical.
How to Reduce Repeat Overheating in West Texas Conditions
High ambient temperatures and dusty work environments reduce the margin available to an air-cooled system. Maintenance should therefore be based on actual operating conditions rather than a generic calendar.
Useful preventive steps include:
- Record normal oil temperature under known loads.
- Inspect the cooler more frequently during dusty operations.
- Keep screens, guards, and stacked heat exchangers clear.
- Confirm fan rotation and speed after electrical or hydraulic work.
- Use the specified fluid and filtration.
- Investigate sudden changes in pressure, cycle time, or operating noise.
- Inspect the cooling system after a pump, motor, or hose failure.
- Trend cooler pressure drop and inlet-to-outlet temperature readings.
- Review cooler capacity when equipment duty cycles are changed.
- Correct leaks before oily residue collects more dirt on the core.
For operations seeking hydraulic oil cooler repair San Angelo, TX, provide the repair shop with the equipment model, cooler identification, fluid type, recorded temperatures, pressure information, and a description of when the problem occurs. Better operating information usually leads to a more focused diagnosis.
Frequently Asked Questions
There is no single limit for every system. Follow the equipment manufacturer’s temperature and viscosity requirements.
As one manufacturer-specific example, a Parker service manual lists an optimum range of 120°F to 140°F for the covered pump series and generally recommends staying below 180°F. Those figures should not replace the limits for your machine, oil, seals, or hydraulic components.
A clogged hydraulic oil cooler may show excessive pressure drop, reduced oil flow, poor temperature reduction, or repeated bypass-valve opening. External blockage may also be visible between the fins.
Proper testing compares inlet and outlet pressure at a known flow rate and fluid temperature with the manufacturer’s specification.
Yes. Hydraulic fluid contamination can restrict cooler passages, interfere with valves, accelerate wear, and contribute to internal leakage.
However, contaminated oil may be the result of another failure. Identify and correct the contamination source before refilling the system.
Only if testing confirms that the current cooler lacks sufficient heat-rejection capacity for the actual load and environment. A larger unit will not fix a relief valve passing oil, worn pump, clogged line, weak fan, or open bypass.
The replacement must also meet the required flow, pressure-drop, pressure, and fluid-compatibility specifications.
Load-related hydraulic system overheating may indicate that the system is producing more heat than the cooler can reject. Possible causes include an excessive duty cycle, internal leakage under pressure, relief-valve flow, reduced fan performance, or an undersized cooler.
Record temperature, load, pressure, and fan operation as the problem develops.
Do not continue operating above the manufacturer’s approved limit. Reduce the load or shut down according to the equipment manual and investigate the cause.
Hot, pressurized hydraulic systems present burn, injection, and equipment-failure hazards.
The replacement may be receiving insufficient airflow or oil flow, or the source of excess heat may still be present. Incorrect fan rotation, a stuck bypass, dirty fluid, wrong viscosity, internal leakage, and improper sizing should all be checked.
Replacing the cooler does not automatically correct a hydraulic-system fault.
Get the Cause Diagnosed Before More Equipment Is Damaged
Industrial hydraulic oil cooler overheating is not a problem to solve by swapping parts at random. The correct repair begins by determining whether the system is producing abnormal heat, the cooling circuit has lost capacity, or the cooler no longer matches the equipment’s operating demands.
Permian Radiator handles commercial, industrial, and heavy-duty cooling-system work for customers in San Angelo and across the Permian Basin. If your cooler is leaking, restricted, damaged, or unable to control oil temperature, call Permian Radiator to schedule an inspection, request a quote, and determine whether cleaning, repair, rebuilding, or replacement is the right next step.


 ICONIER Digital Marketing Agency