
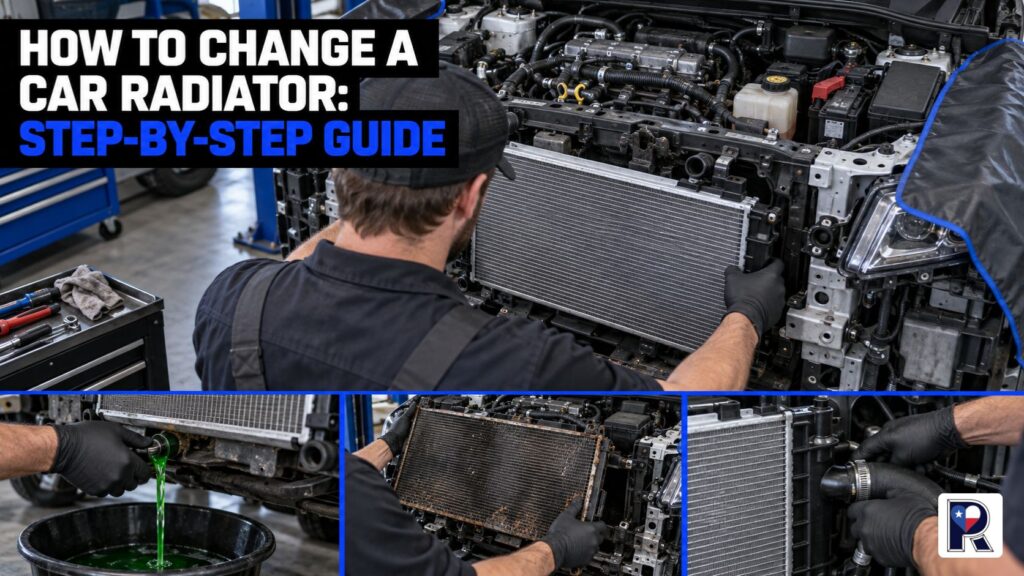
You can change a car radiator yourself if the radiator is accessible, you have the correct replacement part, and you can safely support the vehicle. The job involves draining coolant, disconnecting hoses and electrical parts, removing the old unit, installing the new one, refilling the cooling system, and removing trapped air.
The exact layout varies by make and model. Some vehicles also have integrated transmission cooler lines, tight engine bays, electric fans, or special bleeding procedures, so check the repair manual before removing anything.
Before you begin: Is DIY radiator replacement right for you?
A radiator replacement is manageable for an experienced DIYer, but it is not just a matter of unbolting one part and adding coolant.
You should consider professional help if:
- The vehicle overheated severely
- You are unsure whether the radiator is actually leaking
- The radiator is part of a complicated front-end assembly
- Transmission or engine oil lines connect to the radiator
- The cooling system requires a vacuum-fill tool
- The vehicle has continued overheating after previous repairs
- You do not have safe lifting equipment
- You are working on a diesel truck, fleet vehicle, or specialized equipment
A bad hose, thermostat, water pump, radiator cap, cooling fan, or head-gasket problem can create symptoms that look like a radiator failure. A radiator pressure test can help confirm the source before you buy parts.
In short: Do not start removing the radiator until you know it is the part that needs replacing.
Tools and materials for a car radiator replacement
Gather everything before draining the system. Leaving the vehicle apart while you search for a missing tool creates unnecessary delays.
You may need:
- Correct replacement radiator
- Vehicle-specific repair manual
- Socket and ratchet set
- Wrench set
- Pliers or spring-clamp pliers
- Screwdrivers
- Jack and properly rated jack stands
- Wheel chocks
- Large drain pan
- Safety glasses and gloves
- New coolant or the manufacturer-approved premixed coolant
- Distilled water, if the coolant requires mixing
- Funnel
- Shop rags and absorbent material
- New hose clamps, if the old ones are damaged
- Replacement radiator cap or hoses, if inspection shows wear
Use a replacement radiator that matches the vehicle’s engine, transmission configuration, mounting points, hose connections, and cooling capacity. A radiator that looks similar may not fit or connect correctly.
How to change a car radiator safely
1. Let the engine cool completely
Park on level ground, engage the parking brake, and allow the engine to cool fully. Never loosen a radiator cap or hose while the system is hot.
Hot coolant is pressurized and can cause serious burns. Keep children and pets away from drained coolant because it is poisonous even in small amounts.
2. Disconnect the battery and raise the vehicle if needed
Disconnect the negative battery cable if the repair manual recommends it or if you will be working around electric fans and wiring.
If you need access underneath the vehicle, use a jack and jack stands on a solid surface. Never rely on a jack alone. Place wheel chocks behind the wheels that remain on the ground.
3. Confirm the problem before removing the radiator
Inspect the radiator, radiator hoses, clamps, cap, reservoir, fan, belts, and nearby connections.
Look for:
- Wet areas or dried coolant residue
- Cracks around plastic tanks
- Corrosion around seams
- Bent fins or damaged mounting points
- Loose hose connections
- A fan that does not operate correctly
- Coolant contamination
If the leak is not obvious, a professional inspection may be worthwhile. Replacing a radiator will not fix a failed water pump or thermostat.
In short: Diagnosis comes before disassembly. Otherwise, you may install a new radiator and still have the same overheating problem.
4. Drain the coolant
Place a large drain pan beneath the radiator drain valve, often called a petcock. If the vehicle does not have an accessible drain valve, the lower radiator hose may need to be removed.
Open the drain slowly and direct the coolant into the container. Some vehicles hold several gallons, so use a pan large enough to catch the full amount.
Do not pour coolant onto the ground or into a household drain. Store it in a sealed container and take it to an approved recycling or hazardous-waste location.
Close the drain valve after the system has emptied, unless the repair manual instructs you to leave it open during another step.
5. Remove the fan, shroud, and connected parts
The exact order depends on the vehicle, but common parts include:
- Upper and lower radiator hoses
- Overflow or reservoir hose
- Electric fan connector
- Cooling fan and fan shroud
- Radiator mounting brackets
- Air intake components
- Transmission cooler lines
- Engine oil cooler lines
- Sensors or wiring clips
- Air-conditioning condenser brackets
Label connectors and hoses if you are likely to confuse them later. Keep bolts with the component they came from.
When disconnecting cooler lines, expect some fluid loss. Use the correct wrench where required, cap or protect the open lines, and check the fluid level after installation.
6. Remove the old radiator
Once every hose, line, connector, bracket, and fastener is disconnected, lift the radiator out carefully.
Radiator fins bend easily. Avoid dragging the old or new unit against the condenser, fan, bodywork, or sharp brackets.
Use this opportunity to inspect:
- Rubber mounting cushions
- Fan shroud condition
- Hose ends
- Clamps
- Wiring
- Condenser fins
- Signs of oil or transmission-fluid contamination
Replace damaged supporting parts now rather than reinstalling them around the new radiator.
7. Compare the replacement radiator with the old one
Before installing the new part, place the two radiators side by side.
Check:
- Overall dimensions
- Mounting tabs and cushions
- Hose neck locations
- Drain-valve position
- Fan and shroud mounting points
- Sensor ports
- Cooler-line fittings
- Automatic transmission configuration
If the fittings or mounting points do not match, stop and verify the part number. Do not force a radiator into place or modify connections without confirming the design.
8. Install the new radiator
Lower the new radiator into position without bending the fins. Make sure it sits correctly in the mounting cushions before tightening the brackets.
Reconnect the parts in the correct order:
- Radiator mounting brackets
- Transmission cooler lines, if fitted
- Oil cooler lines, if fitted
- Fan shroud and fan
- Fan electrical connector
- Lower radiator hose
- Upper radiator hose
- Reservoir hose
- Sensors, clips, and other wiring
Tighten fasteners securely, but do not overtighten them. Excessive force can damage plastic tanks, mounting points, or fittings.
9. Refill the cooling system
Confirm that the drain valve is closed and every hose and line is connected.
Use the coolant type and mixture specified for the vehicle. Some cars use premixed coolant, while others require a specific ratio of concentrate and distilled water. Do not guess based only on coolant color.
Fill the radiator or expansion tank according to the repair manual. A funnel can help reduce spills and prevent air from entering while you fill.
10. Bleed air from the radiator and cooling system
Air trapped in the system can cause poor heater performance, overheating, temperature swings, and inaccurate sensor readings.
The correct process depends on the vehicle. It may involve:
- A dedicated bleed screw
- A cooling-system vacuum-fill tool
- A specific fill funnel
- Running the engine through a controlled warm-up cycle
- Turning the cabin heater to its highest setting
Follow the vehicle’s repair procedure. Do not assume that leaving the radiator cap off while the engine runs is safe for every model.
As the thermostat opens, the coolant level may change. Add coolant only as directed and keep watching the temperature gauge.
11. Check for leaks and test the vehicle
Inspect the radiator, hoses, fittings, drain valve, and cooler lines while the engine is warming.
Stop the engine immediately if:
- The temperature rises abnormally
- Coolant sprays or drips
- Steam appears
- The cooling fan does not operate
- A warning light comes on
- The engine runs rough after the repair
After the engine cools completely, recheck the coolant level. Inspect again after the first drive and the next cold start.
A professional radiator pressure test can provide extra confidence if the vehicle had a serious leak, repeated overheating, or an unclear repair result.
In short: A radiator replacement is not finished when the new part is bolted in. The system must be filled correctly, cleared of air, checked for leaks, and monitored under operating temperature.
DIY radiator replacement versus professional service
Situation | DIY may be reasonable | Professional service is safer |
Vehicle layout | Radiator is easy to access | Radiator is buried behind other components |
Cooling system | Standard fill procedure | Vacuum filling or special bleeding required |
Fluid connections | Basic coolant hoses only | Transmission or oil cooler lines are integrated |
Diagnosis | Leak is confirmed at the radiator | Source of overheating is uncertain |
Equipment | Safe jack stands and correct tools available | Limited workspace or lifting equipment |
Vehicle use | Personal car with time available | Fleet, work truck, or vehicle needed immediately |
Repair history | First replacement with no major overheating | Repeated overheating or previous engine damage |
For a normal passenger car, DIY may save labor if you are comfortable with the procedure. If the vehicle supports daily operations, carries heavy loads, or has already overheated, the cost of an incorrect repair can be greater than the original radiator work.
Common mistakes to avoid
- Opening the radiator cap while the engine is hot
- Using the wrong coolant specification
- Reusing damaged hose clamps
- Forgetting a transmission cooler line
- Pinching a hose during installation
- Overtightening radiator mounts
- Leaving the fan connector unplugged
- Failing to bleed trapped air
- Ignoring a damaged thermostat or water pump
- Releasing coolant onto the ground
- Driving without checking the temperature gauge
- Assuming a new radiator will fix every overheating problem
When should you call a radiator specialist?
DIY replacement is not the right choice for every situation. Contact a specialist if the radiator is difficult to access, the vehicle has recurring overheating, or the cooling system includes several oil or fluid circuits.
Permian Radiator provides automotive radiator repair and replacement support in San Angelo, TX, along with radiator cleaning, flushing, pressure testing, rebuilding, and related cooling-system services.
The team also works with commercial, industrial, and heavy-duty applications where a radiator may be connected to hydraulic, lube oil, or transmission cooling systems. Those units often need more than a simple parts swap.
In short: If you are unsure whether the problem is the radiator, cannot safely support the vehicle, or need the car or truck back in service quickly, have the system inspected before taking it apart.
Frequently Asked Questions
Let the engine cool, secure the vehicle, drain the coolant, disconnect the hoses, fan, brackets, and any cooler lines, remove the old radiator, install the matching replacement, refill with the correct coolant, bleed trapped air, and check for leaks.
You can if the radiator is accessible, the replacement part is correct, and you have safe lifting equipment and the vehicle-specific repair information. If the vehicle has complex cooler lines or a special bleeding process, professional service may be safer.
The time depends on the vehicle’s layout, access, tools, corrosion, and whether other components must be removed. Some cars are straightforward, while others require several hours or additional diagnostic work.
Use the bleeding procedure specified in the vehicle’s repair manual. Depending on the model, this may involve a bleed screw, vacuum-fill equipment, a special funnel, or a controlled warm-up cycle.
Use the coolant specification listed in the owner’s manual or repair information. Coolant color alone is not a reliable way to choose the correct product.
Not automatically. The thermostat should be inspected, especially if the vehicle overheated, but replacement depends on its condition and the manufacturer’s service guidance.
Stop driving and have the cooling system diagnosed. Possible causes include a failed thermostat, water pump, fan, radiator cap, trapped air, restricted passage, leaking hose, or internal engine problem.
Conclusion
Learning how to change a car radiator can save time when the vehicle has a confirmed radiator failure and the job is within your skill level. The most important parts are safe preparation, correct part selection, careful reconnection of hoses and cooler lines, proper coolant filling, and removing trapped air before driving.
If your vehicle is overheating, leaking coolant, or has a radiator problem that is difficult to confirm, contact Permian Radiator in San Angelo. The team can inspect, repair, replace, rebuild, flush, and pressure-test automotive and heavy-duty cooling systems.
Call Permian Radiator or request a free quote before a cooling-system problem leaves you stranded or takes a work vehicle out of service.


 ICONIER Digital Marketing Agency